Base Building
With base building you can set up a base on a body in any system, except the starter ones. Travel to the system and body you want, and if you meet the requirements you can build the foundations.
You can only have one base, and once it is built it cannot be moved: the system and body you build on are final.
Founding a base costs 5,000 units each of Ingots, Refined crystals, High end crystals, Propulsors and Nanoconductors, all produced at the Laboratory.
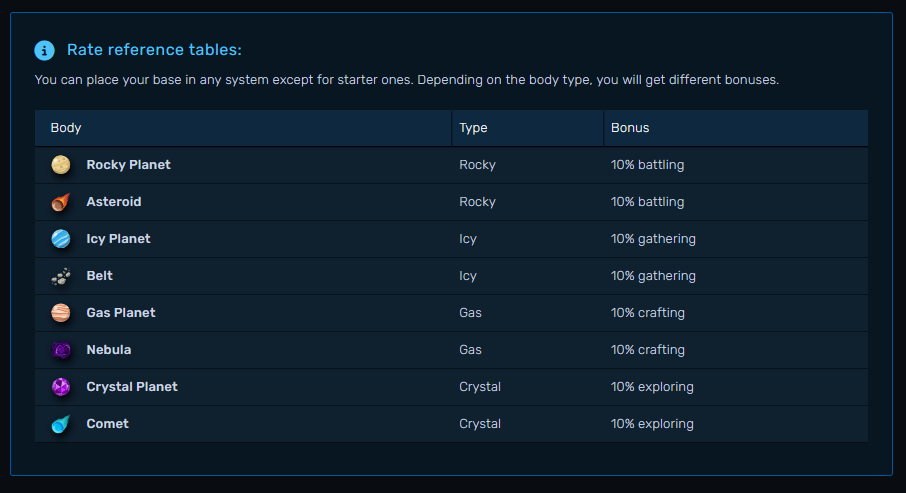
The body type you build on grants a permanent 10% bonus to one of the core activities. Since the base cannot be moved, this choice can never be changed:
| Body | XP bonus | Income bonus |
|---|---|---|
| Rocky Planet, Asteroid | Battling XP | Credits from battling |
| Icy Planet, Belt | Gathering XP | Resources from gathering |
| Gas Planet, Nebula | Crafting XP, Craftron 3000 included | - |
| Crystal Planet, Comet | Exploring XP | Cosmic dust, Voyager included |
You can rename your base at any time.
Remember
You do not need to be in the same system as your base to upgrade or use its modules. You can use active modules, and collect from passive ones, from anywhere in the galaxy.
Modules
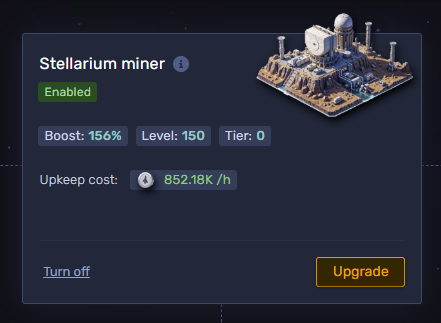
All 11 modules live inside your base. You start with one unlocked, the Stellarium miner.
Stellarium is your main base building resource. The miner produces every 5 hours, and upgrading it increases how much you get per tick.
You unlock the rest of the modules with Stellarium, and each unlock costs more than the last: with N modules already unlocked, the next one costs N * (N + 1) / 2. Every module also has requirements, so the tree has to be opened in order.
Upgrading a module
Modules are upgraded in two ways:
- Level, paid with the materials that module uses. The cost is charged in full from each of them, so the Stellarium miner spends the same amount of microcircuits and of fusion cells. The curve steepens at levels 600, 1000, 1500, 1750 and 2000, where each new level costs 2, 4, 8, 16 and finally 64 times the base rate.
- Tier, paid only with Stellarium. It uses the same scale as unlocking, which stays cheap up to tier 100 and then doubles its per tier price every 50 tiers.
Module boost
Level and tier combine into the module boost:
boost = level * (1 + tier / 100) * (1 + module efficiency / 100)
That number is a percentage, not the output. Each production tick gives you the module's base amount, plus one extra base amount for every full 100% of boost, plus a roll on whatever percentage is left over. A module at 250% boost always produces 3 times its base and has a 50% chance of a fourth.
| Module | Base amount per tick |
|---|---|
| Resource miner | 20,000 |
| Metal scrap generator | 1,500 |
| Material generator | 200 |
| Fuel facility | 5 |
| Every other module | 1 |
The Quantum server and the Laboratory enhancer only count half their level in that formula, so they need twice the levels to reach the same boost.
Module efficiency
In the Technology skill tree you can upgrade your base module efficiency. This bonus is multiplicative on every module boost, so it is worth raising early if you rely on your base.
The modules
Heads up
The production numbers on this page are the ones running on the web realm. Some of them may be tuned differently for the Steam release, so use them as a reference and check the module panel in game for your exact values.
| Module | Type | Requires | Levels with | What it does |
|---|---|---|---|---|
| Stellarium miner | Passive | - | - Microcircuits - Fusion cells |
Produces the Stellarium that pays for unlocks and tiers, every 5 hours |
| Material generator | Passive, setup | Stellarium miner | - Aerolite | Produces the materials you select, splitting the output between them |
| Metal scrap generator | Passive | Stellarium miner | - Cryovita | Produces Metal Scrap. The catalyst crafting scrap bonus applies here too |
| Resource miner | Passive, setup | Stellarium miner | - Ferricrystal | Produces the gathering resources you select, splitting the output between them |
| Quantum server | Passive | Material generator | - Microcircuits | Produces Quantum Cores, and raises the cores you loot in Dungeons |
| Craftron 3000 | Active, setup | Metal scrap generator | - Luminaris | Converts Metal Scrap into crafting XP, and adds crafting power in dungeons |
| Fuel facility | Passive | Resource miner | - Fusion cells | Refuels your ship and your Voyager, up to each cap |
| Research lab | Passive | - Quantum server - Craftron 3000 - Fuel facility |
- Warp capsule | Raises the chance of finding Anomalies while Battling |
| Item booster | Active, setup | Research lab | - Fusion cells | Turns a crafted item into an Anomalous one |
| Laboratory enhancer | Passive | Research lab | - Microcircuits | Adds extra output to every unit produced at the Laboratory |
| Battling Trainer (PvP) | Passive | - Laboratory enhancer - Item booster |
- Warp capsule | Multiplies the PvP badges you earn each day |
The Material generator, the Resource miner and the Quantum server do double duty: their module output is also what sets how much you loot from dungeon runs.
Item booster: making an item anomalous costs 1 Anomaly plus credits, starting at 300m and rising with the module boost. Only crafted items qualify, and the result is bound to your account, so an anomalous item can no longer be traded or wired.
Module types
There are two kinds of modules, passive and active.
Passive
These run on their own and have an upkeep cost in credits.
The charge is derived from your average daily credit income, meaning every credit you have ever earned divided by the days since you registered. That figure is split across the hours, the ticks and the passive modules you have unlocked:
charge per module per tick = average daily income / 5184 / passive modules unlocked
and each module then pays that charge raised by its own boost, so a stronger module is more expensive to run.
The collector charges every 10 minutes. On the sixth charge the module produces its drop and the counter resets, which means one payout per hour. If a charge cannot be paid, the module is switched off and you get a notification.
Three things bring the bill down:
- Holding PvP map tiles that grant a base boost with your squadron.
- The catalyst base upkeep reduction stat, up to its cap.
- Daily quests: each one covers 15% of your daily upkeep, so clearing all five covers 75% of it.
Active
These have no upkeep cost. They generate items or materials when you use them.
TL;DR:
- You only get one base and it can never be moved, so pick the body carefully: its 10% bonus (XP, plus credits, resources or cosmic dust depending on the body) is permanent.
- Stellarium is the bottleneck: it gates both module tiers and unlocking new modules.
- The module boost is a percentage, not an amount. Below 100% you are only rolling for a second unit.
- Passive modules only pay out on the sixth upkeep charge, so keep enough credits to cover them, and do your dailies to cover most of the bill.